Hey yall!! This is Melanie from
My Billie. I'm so happy that Allison is off exploring away in Japan! And while I miss her terribly, I'm happy for the opportunity to interact with her awesome blog readers. I can tell you guys all really support what she's doing over here, and she more than deserves that!
First off--hi : ) A little about me: I'm obsessed with my sweet little Maddy cakes. She's a Chinese Crested Powderpuff and one of the best things that has ever happened to me : ) Me and my darling Matthew like to eat pancakes and drink coffee at all hours of the day. I work part-time at a coffee shop and spend the rest of my time making things..or sleeping...or playing Mah Jongg.

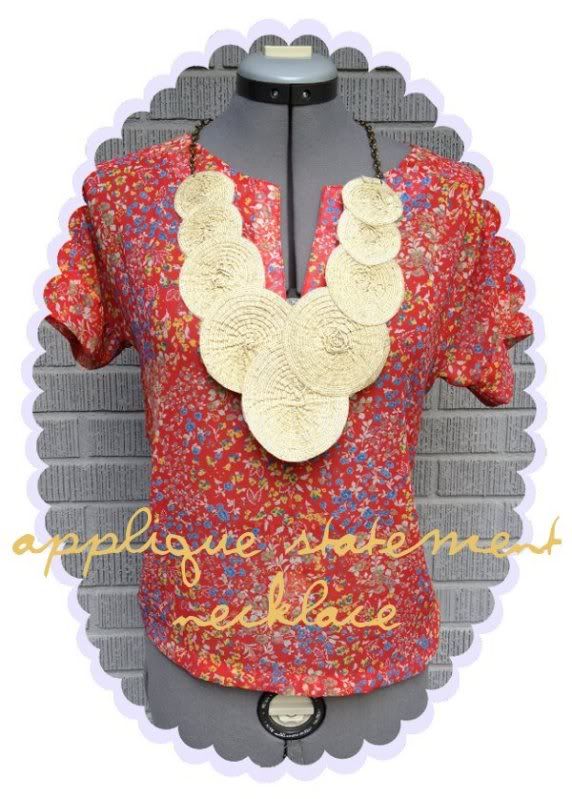
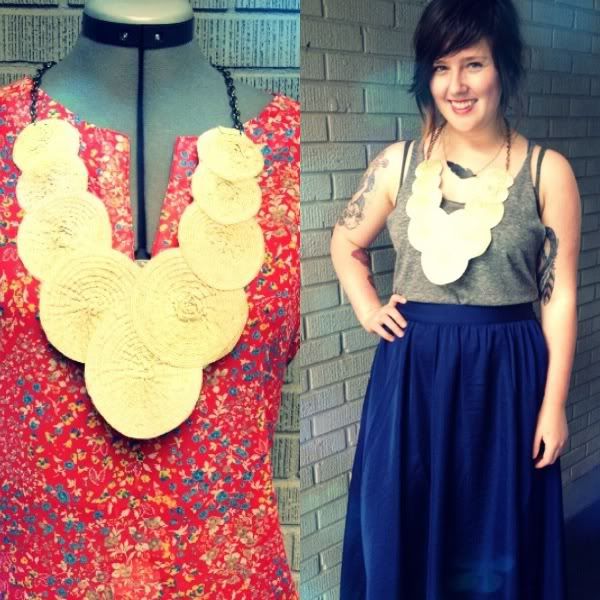
But speaking of making things, I ran across this great applique meant to be ironed onto a shirt and thought it'd be a much better statement necklace instead! Here's what I came up with! It's incredibly easy to make.
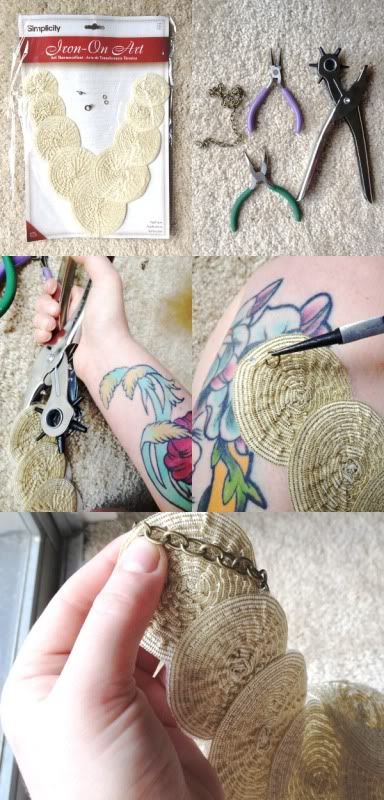
First grab a few supplies: an iron-on applique, a couple of jump rings, a couple of pliers, a few inches of metal chain and a clasp (I started off with plans to add a clasp onto mine but opted to keep the chain longer, meaning I didn't really need one after all!). If you have a rotary hole puncher handy, such as the one pictured above, go ahead and clip some holes in the top of the applique. If not, just puncture some tiny holes at the top with the end of your scissors (it won't be big enough to really see as long as you keep the hole small). Open up a jump ring and insert it into the hole. Before you close the ring, slide one end of your chain into it, then close up. Do the same thing to the other end and voila, a finished product!
Thanks for letting me share this with you guys! If you want to check out more DIYs and fashion posts just check out my blog. I'd love to meet you all and I've got a TONS of fun stuff coming up in the next month.
Hugs!
Melanie