Hi all! This is the second installation of Blog Design 101 where I give mini design tutorials to help you spiffy up your blog. Last week we covered links - what they are and how to write them in different formats. This week I plan to give you a powerful and easy trick when it comes to resizing images.
TODAY I AM GOING TO COVER:
How to adjust the size of your images proportionally so that they can neatly align on your page.
When I asked for some design questions a few of you wanted to learn how to make images all the same width so that they align cleanly on your sidebar, posts, etc. Additionally, some asked to learn how to proportionally resize images - especially when it comes to buttons. Easy enough. Both go hand in hand!
To start out with
A basic image html tag is as follows:
TO RESIZE YOUR IMAGE
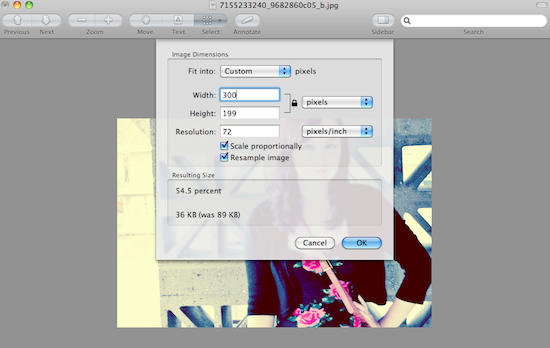
First you need to figure out what size the original photo is in pixels. You can do this by viewing the image in a photo editing program and looking at the photo's information (for example - mac users open in preview > tools> adjust size > pixels).

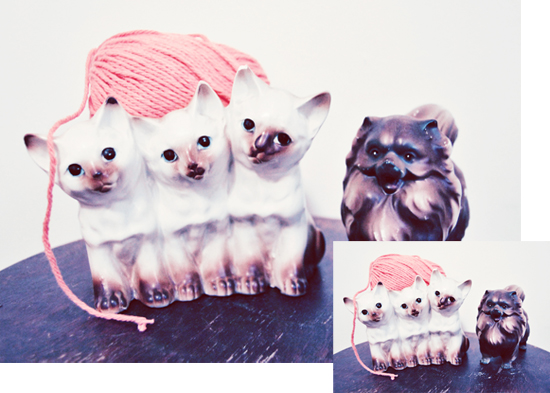
Once you know the original size of the image you uploaded (^ the above image is 550x365), determine the size you want the image to be either in width or in height. For this example - I want the image to be resized to 300 pixels in width. I then use the program I opened the original photo in to adjust the proportions. Typing in 300 pixels wide should automatically resize the image to it's proportional height. If you are great at math - by all means do the calculations yourself - I just find doing this way easier for me.

In this case it was a 54.5% image reduction making the height 199 pixels. Take the new size adjustments and simply paste them in to the following code.

PROPORTIONAL IMAGE RESIZE:
EXAMPLE:
With this code you can now resize images so that they all are the same widths and align properly in your posts. This code is also extremely useful when you need to resize a button to fit the width of a friends sidebar and don't have the time to redesign a new one.
If you need further help or clarification please let me know and I will be happy to answer them in the comments section. Also - if you have any other design questions you would like answered in future posts please let me know. Have a great Tuesday everyone!!


Thank you for showing this! It's great to hear tips and tricks on blog design...I'm a real novice so this has helped! Please post more of these!
ReplyDeletedimplesdiaries
x
Will do :] Glad I could help!!
Deletehmmm i will probably save all these bloging posts under bookmark. a younger boy would call you noona, but you are older than me allison, so i would call you unnie. that is what my sister has called me her whole life, if she ever calls me michelle, it feels so weird lol.
ReplyDelete:] That is so sweet!
DeleteGreat tutorial! I'm already ok with blog design, but this will be really helpful, especially if you are posting photos which are all different sizes & want the photos the same. xx
ReplyDeletewww.almostdelightful.com
Thank you. I hope this helps them :]
DeleteThis series is definitely going to be super helpful for a lot of people. I'm excited to see what you cover next!
ReplyDelete:] I need to figure out where to go next with it. I also really want to get in to photoshop and graphics.
DeleteThank you for showing me (a mac user) where to go to do this. It sounds like no big deal, but I would have been stumped as this computer is SO different than using the PCs I've been accustomed to since...forever.
ReplyDeleteAgain, thank you for these tutorials. Honestly, this is one of my new favorite things about your blog - it's so informative! :)
:] I am glad I could help you find where to look for it! I felt a wee bit bad that I couldn't include the steps for a PC because I haven't used one in a bit. I am sure there is a program though with similar features.
DeleteThank you! I hope they can get more in depth. I know these seem pretty simple right now. I just thought I should start with the basics though first.
I'm pretty decent at html/photoshop, but I love that you are sharing these because a lot of people need help and simply don't understand and your blog is so beautiful, who wouldn't want to take tips from you!?
ReplyDeleteAw, thanks! Yeah, I am hoping to help out those beginning right now. In the future though I want to get in to some more advanced html and photoshop techniques.
Deletefab tutorial! :) Love your re-design, it looks ever so lovely.
ReplyDeleteThank you x2 :]
DeleteThis is great, and so nice of you, I'm such a novice! I wish I could make the pretty collages that are floating around too, without photoshop though...if I get photoshop I can see all my time being chewed up! xx
ReplyDelete